
World 1 Item House
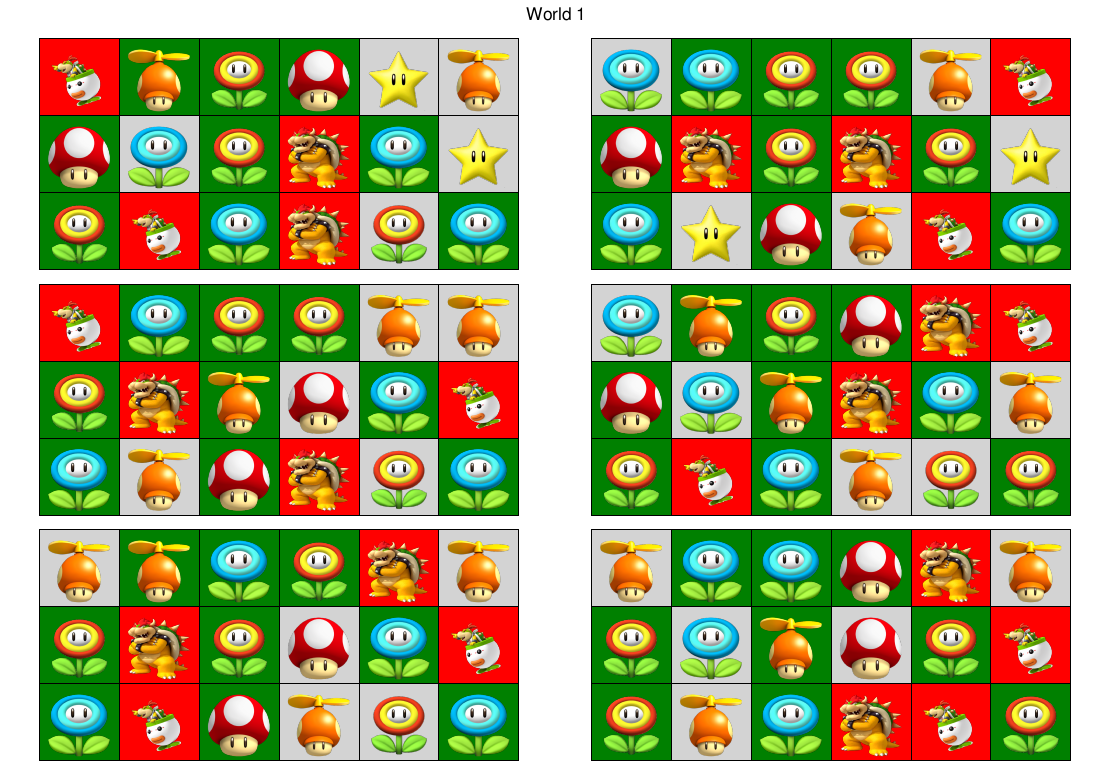
As you can see, there are only 6 possible patterns that you can get in ANY of the red item houses in World 1. There will be a DIFFERENT set of 6 patterns for each world. This means we can 100% guaranteed get every item every time.
The way we do this is by starting in the same spot, following the same path, and listening for different sound effects of flipping a bad panel, good panel, or getting a match. Based on the order we hear, we can narrow down which of 6 patterns we have within just a few flips. It's IMPORTANT to follow the same path so that the matches happen in the same spots which allow you to tell the difference between the patterns. Taking the same path also helps with memorization.
Once we narrow it down to 1 pattern, all we have to do is dodge 1 Bowser panel and 1 Bowser Jr. panel. To make memorization easy, there is no need to memorize every single detail about every pattern! All you need to know is...
- How to identify the pattern
- The path you take and which 2 panels to skip
- The items that each pattern gives you
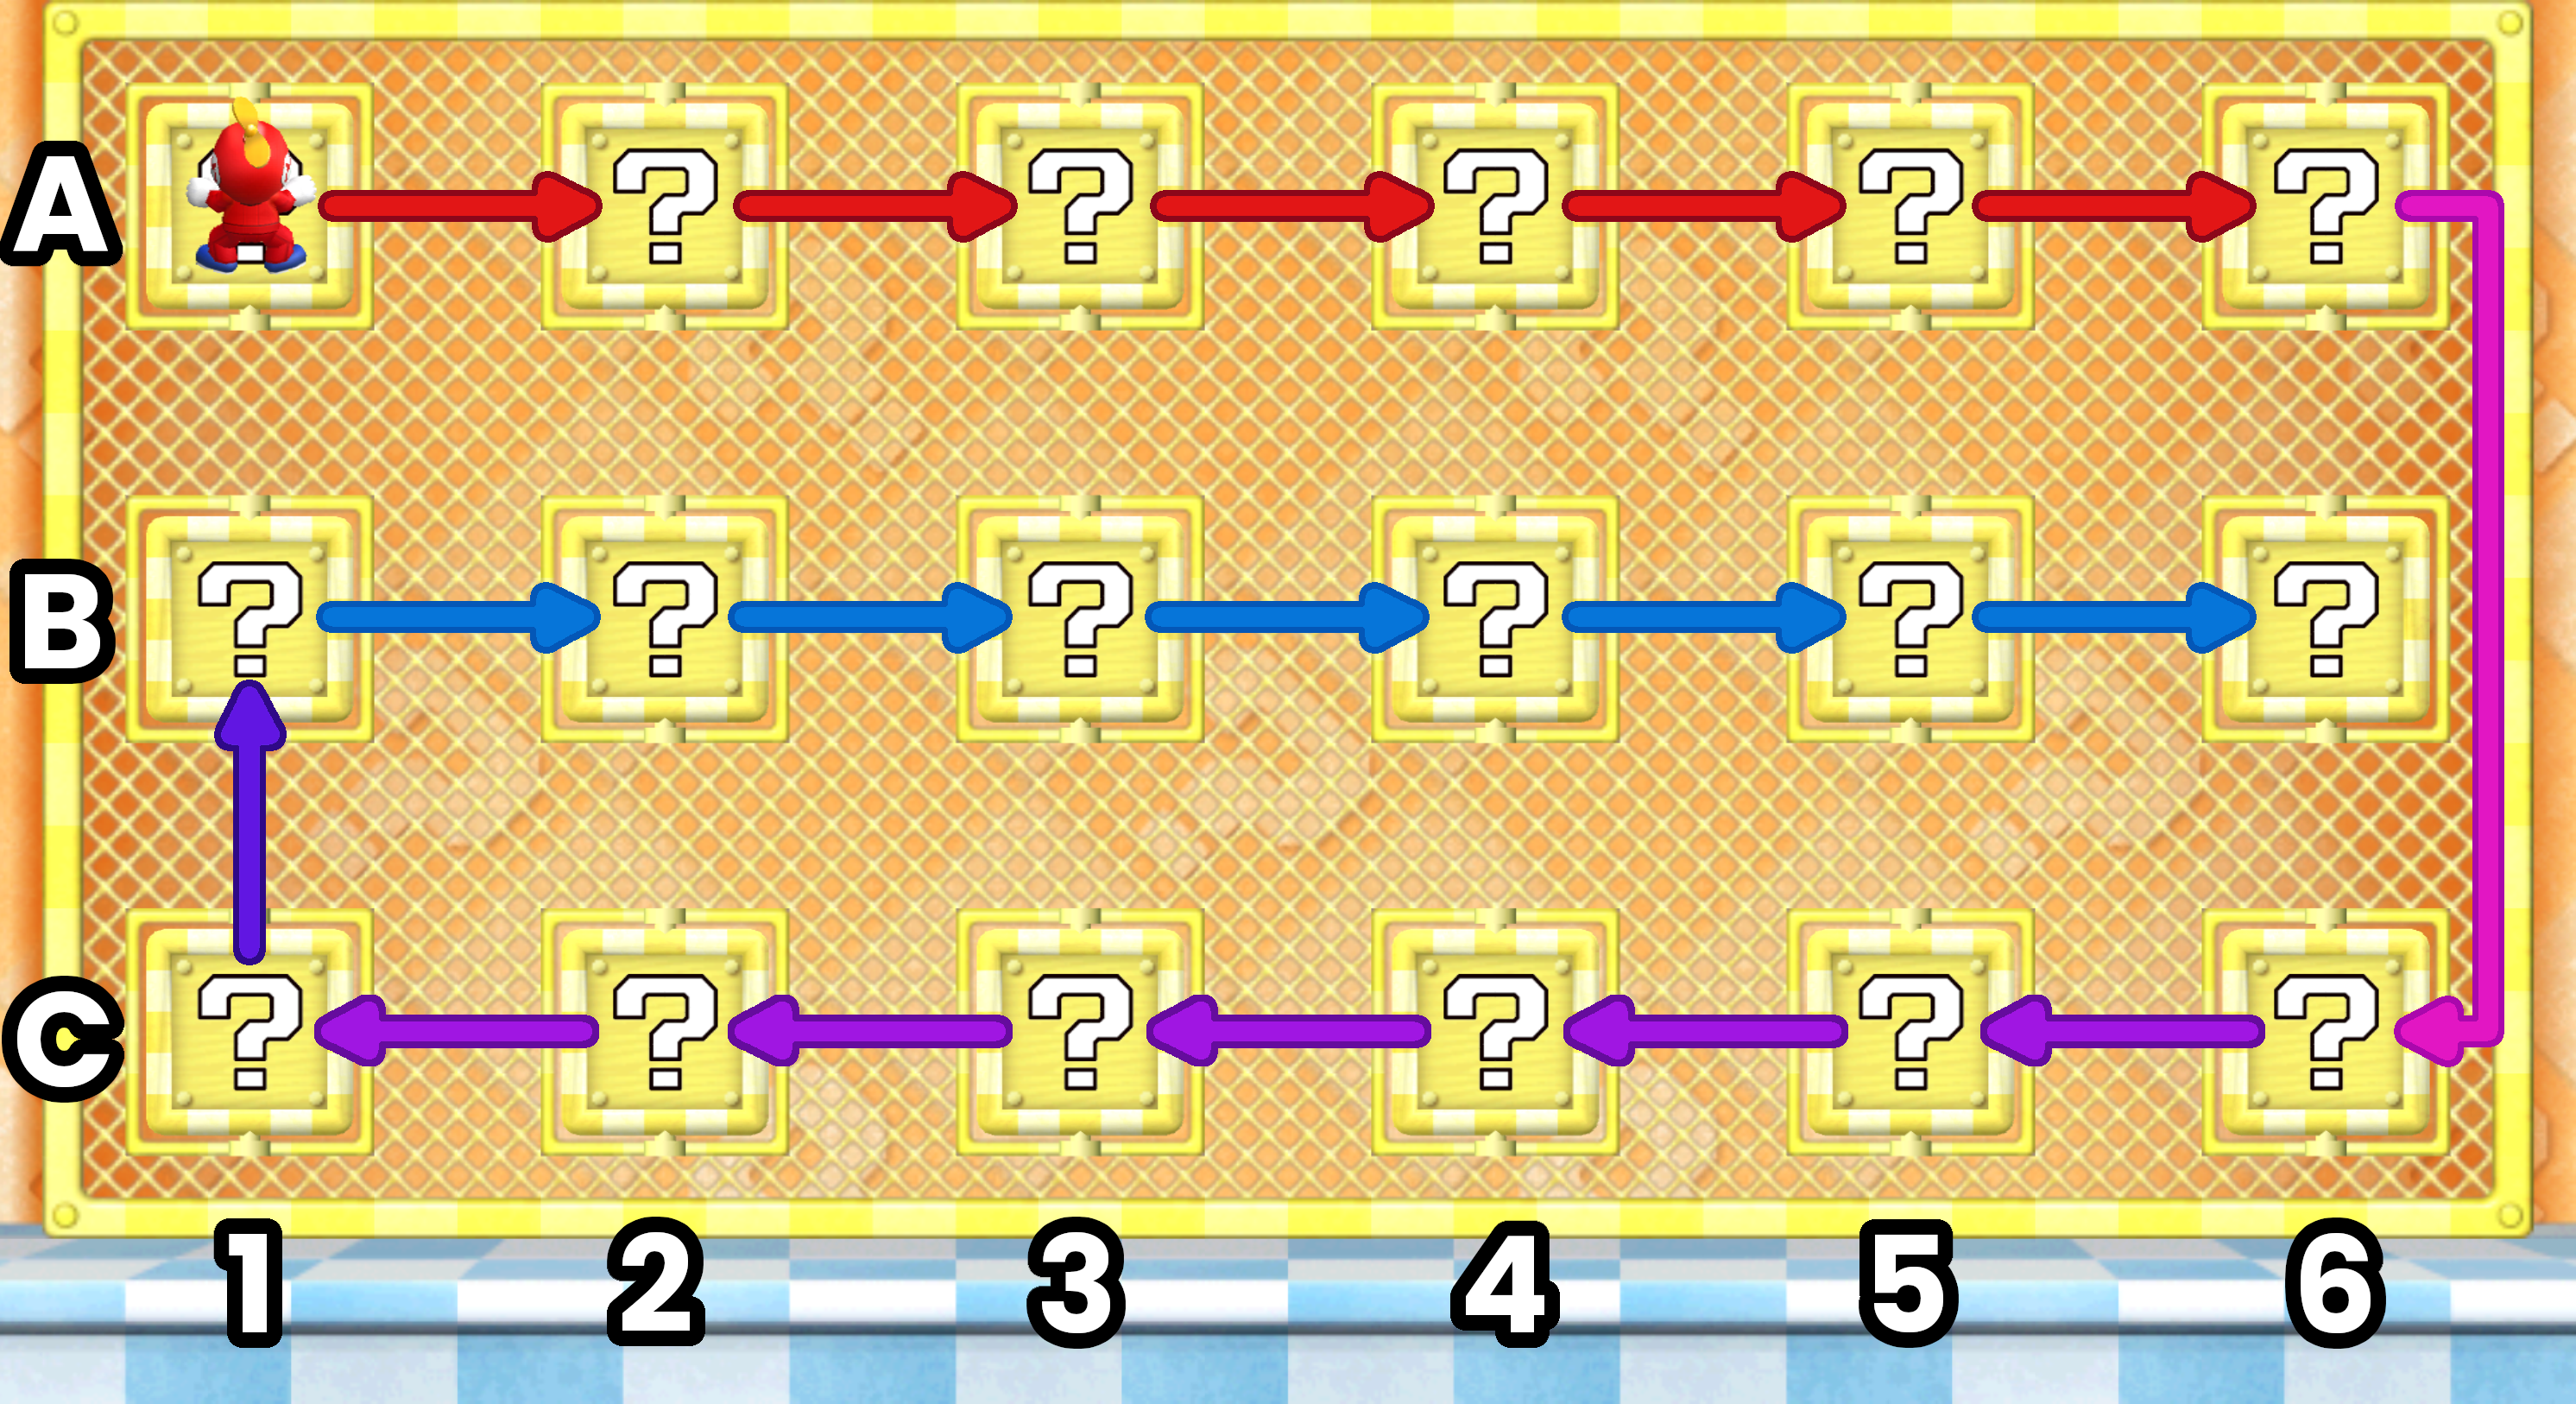
Below you can see a diagram displaying the path! Doesn't matter which of the 6 patterns you get, this is the path you will take for all of them, at least for World 1. Are there other options that could be faster? Probably, but this one is simple.
Navigating the Room
To find the top left: Normalize in the top left corner by holding <^ , then hold v> for 3 "fence climbing" sounds, and flip the panel.
Each panel is about 6 climbing sounds away from each other. If you want to be safe, try flipping on the 5th climbing sound and if you miss then you know you are early and to continue in the same direction to adjust.
To find the bottom right or left panel: Normalize in the corner and do a Tap-Crouch-Jump w/out Run button away from the wall, then hold up for 3 climbing sounds, and flip the panel.
To find the middle row, do the same Tap-Crouch-Jump and then hold up for 9 climbing sounds, and flip the panel.
If you would like to go faster, after each panel flip continue to hold the run button to climb faster.
Learning the Patterns
Below is a flow chart made by SpaceTurtle that you can use to learn and visualize the different patterns. Notice the grid system coordinates A1-6 , B1-6 , C1-6 which are used to describe specific panels shown in the above diagram.
For example:
If you get a Bad Panel first, that already narrows it down to 2. If you then get a match on A4, you know which pattern you have! Then you would finish flipping the top row, move to the bottom row and skip C4, and then move to the middle row and flip B1-5. The game will end once you flip B5 before you have a chance to flip the last bad panel B6 so you don't even have to remember that. (If you would like a visual, this pattern is the middle-left in the image at the top of this page)
Another example:
If you flip A1-4 and don't get a single match or bad panel then A5 & A6 are both bad. This means you can flip the entirety of row B & C!
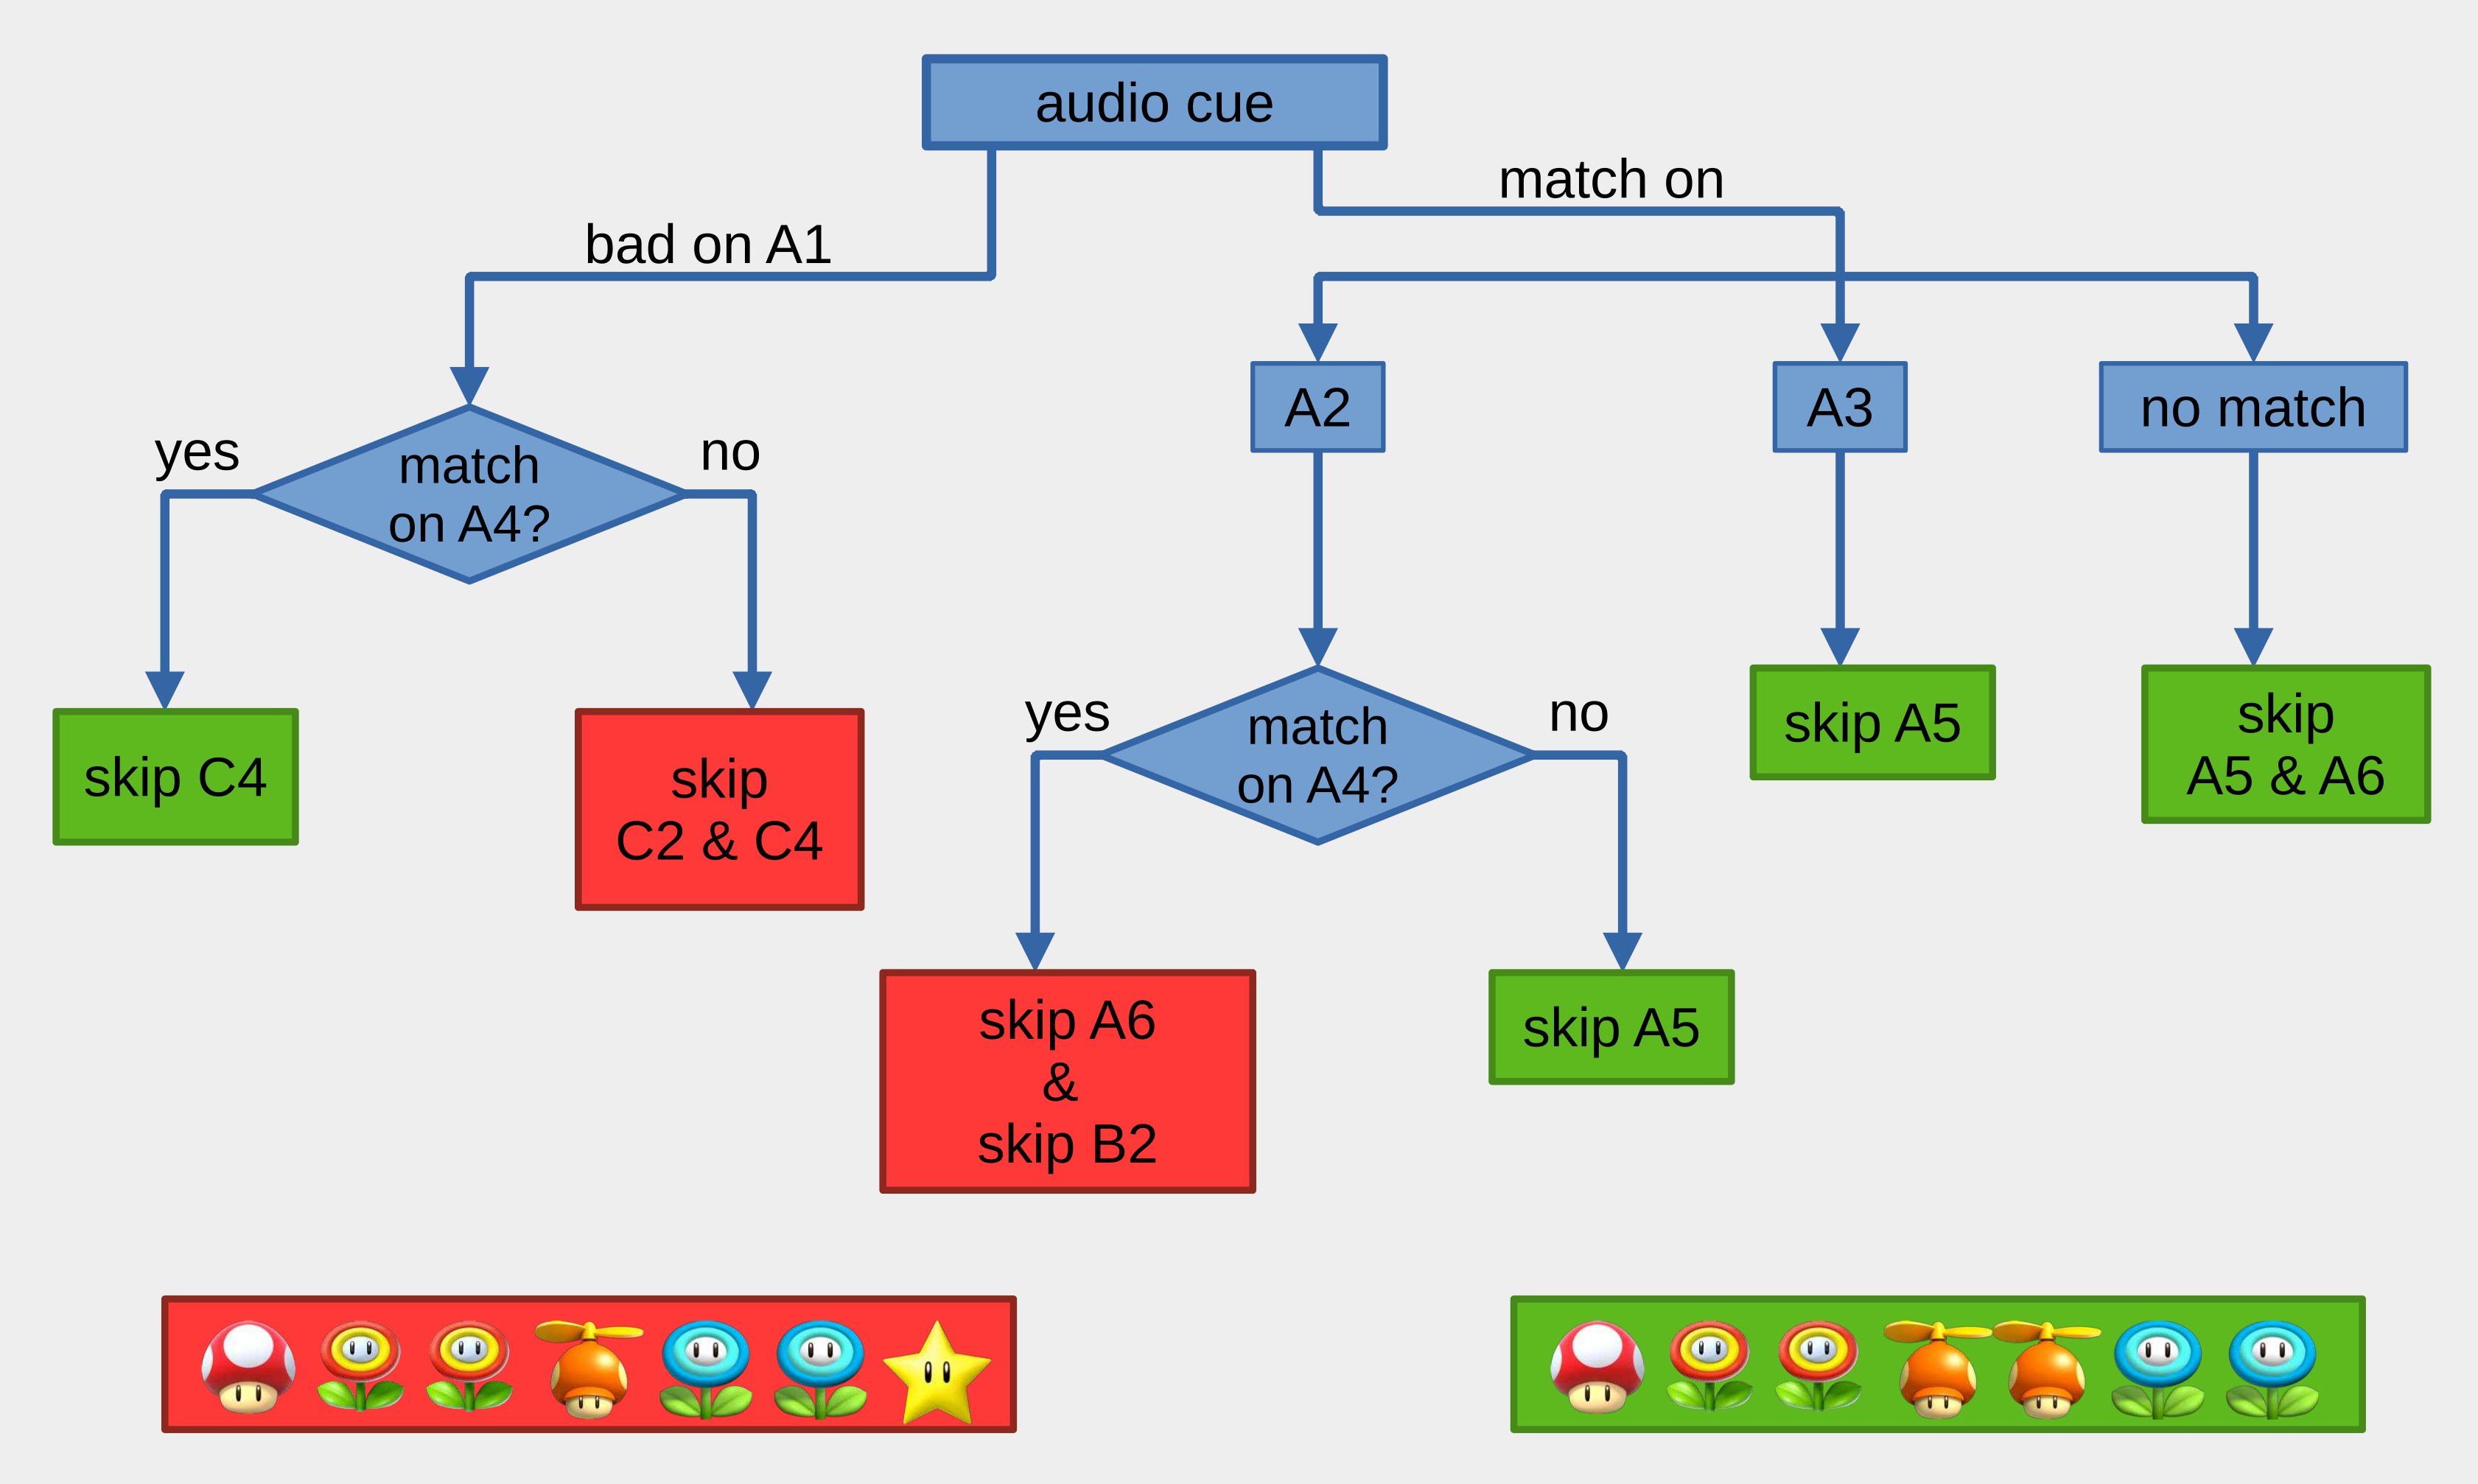
Notice the color coded boxes which refer to the set of items you get for that pattern. There are ONLY 2 sets of items you can get show in the bottom right and bottom left. The item sets are the same except the red box replaces 1 propeller with a star.
If you are a beginner learning Any%, propellors are much more important. If you get one of the 2 red box patterns, then you can choose to reset. If you choose not to continue runs that have a star in them, that means you don't have to bother memorizing those 2 patterns!
Below is a different diagram made by FunkopotamusWes if you would like a different way of learning the patterns. Notice these details:
- Blue arrows in the top row means match, which is how you will identify the pattern
- Red X means panel you must skip
- Red arrow means bad panel that you don't have to skip it if you want less to memorize
- Green means good panel
